
What is it and what are you doing to celebrate Christmas Card Day?
Around this time of year people start to think about mailing their Holiday Cards, so it doesn’t come as a surprise that Dec 9th is Christmas Card Day. This gives you a chance to get them signed and in the mail, so your love ones will receive them by Dec 25th. Keep in mind that you should mail them before Dec 12th so they will arrive in time for the big day. Hey! We live in Canada, so you never know when there is going to be a snow delay.
Guess what I am doing to celebrate Christmas Card Day. It should come as no surprise, I’m making cards. I have been working on them and I am almost ready to send them. First I make sure that I get the cards ready for the people that live farthest away, then work on the ones that lives closet to me.
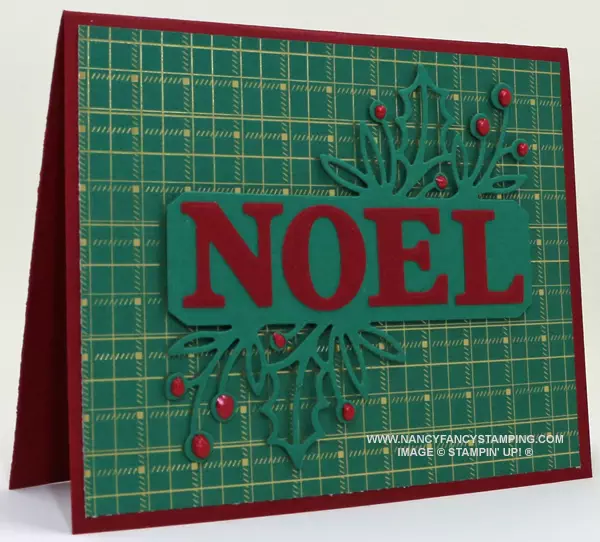
Below are the instructions that I used to make this beautiful NOEL Christmas Card that is my latest creation.
SUPPLIES
Stamp:
N/A
Inks:
N/A
Paper (including Cutting Dimensions):
Cherry Cobbler Cardstock {CS} (119685) 5-1/2” x 8-1/2”
Shaded Spruce Cardstock {CS} (146981) 4” x 4-1/2” & a piece of scrap paper
Joyful 12″ x 12″ Specialty Designer Series Paper {SDSP} (161980) 4” x 5-1/4” – Shaded Spruce and Gold Tartan
Basic White Cardstock {CS} (159276) 3-3/4” x 5” (inside only)
Accessories:
Basic White (102300)
https://www.stampinup.ca/products/bone-folder?demoid=2018425
Christmas Classics Dies (161976) – Rectangle Frame Die
Joy of Noel Dies (161965) – NOEL Die
Stampin’ Cut & Emboss Machine (149653) OR Mini Stampin’ Cut & Emboss Machine (150673)
Paper Snips Scissors (103579)
Pearilized Enamel Effects Basics – Real Red (156310)
Adhesive Sheets (152334) – 2” x 2”
Stampin’ Seal+ (149699)
Stampin’ Dimensionals (104430)
Basic White Medium Envelopes (159236)
INSTRUCTIONS
- Fold the Cherry Cobbler CS in half and crease it using a Bone Folder. The fold should be along the top. This is your card base
- Cut the piece of the Shaded Spruce and Gold Tartan – Joyful 12″ x 12″ SDSP to measure 4” x 5-1/4” and adhere it to the Cherry Cobbler card base using Stampin’ Seal+.
- Run the Rectangle Frame Die (from the Christmas Classics Dies) and the Shaded Spruce CS through the Stampin’ Cut & Emboss Machine OR Mini Stampin’ Cut & Emboss Machine.
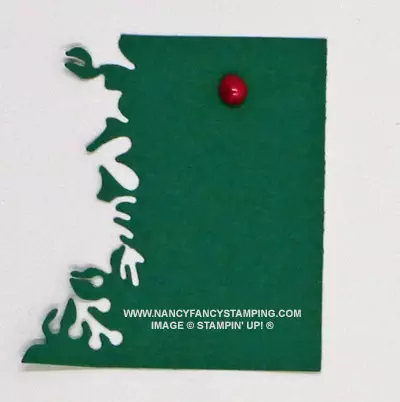
- I am now going to create the Berries using the Real Red Pearilized Enamel Effects. TIP: Anytime that I am cutting the cardstock down to create a layer, I keep the piece that I am not using at that time and put it back into that package of cardstock. It can then be pulled out and used on a later project. This card project is another one of those times. I am going to test the colour of the Real Red Pearilized Enamel Effects on the Shaded Spruce CS. I gentle squeeze a small amount onto the CS. I am satisfied, so I am going to apply a drop wherever there is a Shaded Spruce Berry. As I apply them, there is a little that sticks up, don’t worry, it will dry smooth. Don’t be too fussy, they’ll look great. You can test how long it takes to dry, by checking on the test drop. That way you won’t mess up the ones for the card. It is just that simply. Set this layer aside to dry.
- To create the NOEL letters, you attach the piece of Adhesive Sheet to 1 side of the Cherry Cobbler CS. Place the NOEL Die (from the Joy of Noel Dies) on the opposite side of the Adhesive Sheet and run them through the Stampin’ Cut & Emboss Machine OR Mini Stampin’ Cut & Emboss Machine. TIP: I laid the Cherry Cobbler letters on the Shaded Spruce frame to judge where I needed to place them. I peeled off the Adhesive Sheet backing for the “N” and lightly put it in place. Next, I did the same for the “L”, then the “O” and finally the “E”. This helps if you have to move any one of the letters because of a spacing issue. Once you are satisfied, press them all in place.
- Adhere the NOEL Shaded Spruce Frame to the card base using Stampin’ Dimensionals.
- Decorate the inside and Basic White Medium Envelope if you would like.


 Specialty Designer Series Paper")


I know that all of you can make handmade Christmas Cards. You probably have the supplies on hand. Don’t worry if they are only simply. It is the thought that matters. Celebrate Christmas Card Day by making a couple.